Can I Install Starlink on my Roof?
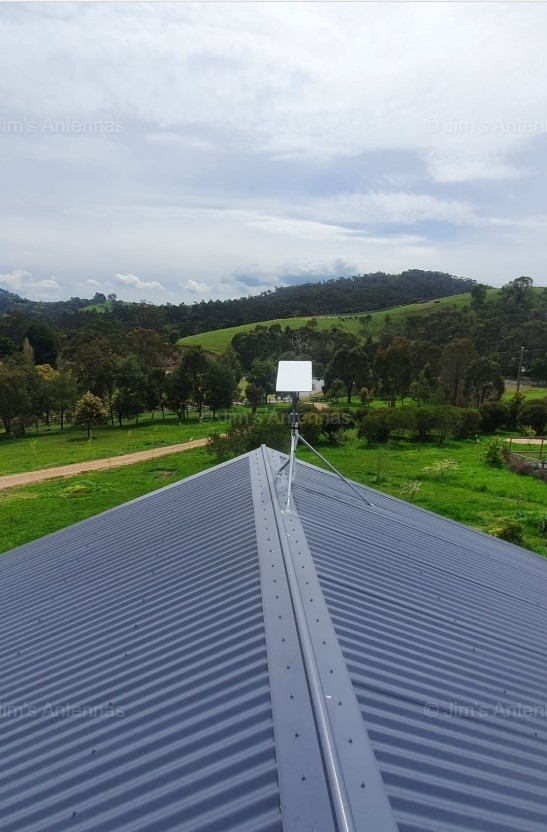
Yes, in most circumstances the Starlink satellite is best installed somewhere on your roof, which may assist in avoiding obstructions as well as keep the cabling protected and out of harm’s way.
An obstruction test (using the Starlink application) is important to conduct and will assist in deciding the correct location and height of your installation – your Jim’s Antennas technician can assist you with this. The dish will typically need to point towards the South, so if you have high trees, other structures or buildings in the way, this may require a taller pole or moving to a different location.
A flat roof can make for a more complicated installation as there is often no room for cabling requiring it to be run on external walls and contained in conduit for protection. While in comparison, it is usually easier to install on standard pitched roofs as there is often plenty of room in the roof space to run the cable. Therefore the cost of installation for homes with flat roofs is often slightly higher than those with standard pitched roofs (unless it has internal raked/cathedral ceilings).
The Starlink cable is a custom-designed set length of 30 metres. It has very specific connectors on each end and can be easily damaged if not installed correctly. It cannot be cut or re-terminated, so care is required when installing to avoid extra cost if damaged or poor signal strength due to incorrect installation.
The construction material of your roof will determine the type of mount required and therefore the price. Additionally, the Starlink dish has a unique, proprietary-designed mounting pole stem which requires purpose-built hardware specifically designed for the Starlink satellite.
If the dish is unable to be mounted on your roof for any reason, we will do our best to come up with a bespoke design to ensure you receive the best possible reception for your new Starlink system. This would be specifically quoted only after an on-site visit or in consultation with your Jim’s Antennas technician.
Finally, if it is difficult and dangerous for an installer to get up onto your roof, you can also expect to pay slightly more, eg; single story versus double story, or very steep pitched roofs.
The following types of mounts are some examples of those used for Starlink Installations:
- Tin Roof Mount
- Gutter Mount
- Tile/Flashing Mount
- Universal wall mounting
- Bespoke design or Guy-Masted Pole (3m+)
PLEASE NOTE that the 4 legged mount that comes in the Starlink kit is a ‘Ground Mount’ only and is designed for you to test the Satellite service on the ground prior to having the dish properly installed. Do not use the ground mount for a final installation on your house.
There are some mounts available from the Starlink website but some are not suitable for Australian conditions or roofing designs. Please consult with your Jim’s Antennas technician if you aren’t sure about what mount is best for your situation.
Next Question: How Can I Extend the WiFi Range of my Starlink?